Microgreens Farming in South Africa, The Highest Revenue-per-Square-Metre Crop Available
Microgreens are young seedlings of vegetables, herbs, and edible flowers harvested at the cotyledon or first true-leaf stage, typically 7 to 21 days after germination, when the plants are 3–8cm tall. Despite their tiny size, microgreens contain concentrations of vitamins, minerals, and antioxidants many times higher than the mature vegetable of the same species, a fact extensively studied by the USDA and numerous university research groups. This nutrient density, combined with their visual appeal and intense flavour, has made them a staple of fine-dining kitchens, health-conscious households, and premium food retail across South Africa and globally.
For South African farmers and food entrepreneurs, microgreens occupy a uniquely attractive position: they require almost no land, no soil (many are grown on coco coir or jute pads), minimal water, basic lighting (natural or LED), and produce a harvestable crop in less than two weeks. The result is the highest return per square metre of any food crop produced in South Africa, consistently generating R500–R2,500 per tray (standard 25cm × 50cm tray) at retail prices, across an unlimited number of harvest cycles per year.
Microgreens can be produced at many scales, from a spare room in Johannesburg to a greenhouse in the Western Cape, a shipping container in Durban, or a plot in a rural township. They are the ideal entry point for new farmers, a powerful supplementary income stream for existing operations, and a commercially viable standalone business at larger scale.
🌱 Revenue potential: A single 1.2m × 2.4m growing shelf unit holding 20 standard trays can produce 20 harvests in rotation, generating R200–R800 per harvest cycle (10–14 days). Ten such shelf units in a 30m² space can generate R20,000–R80,000 per month in gross revenue, more than most conventional vegetable farmers earn from a full hectare of soil-grown produce.
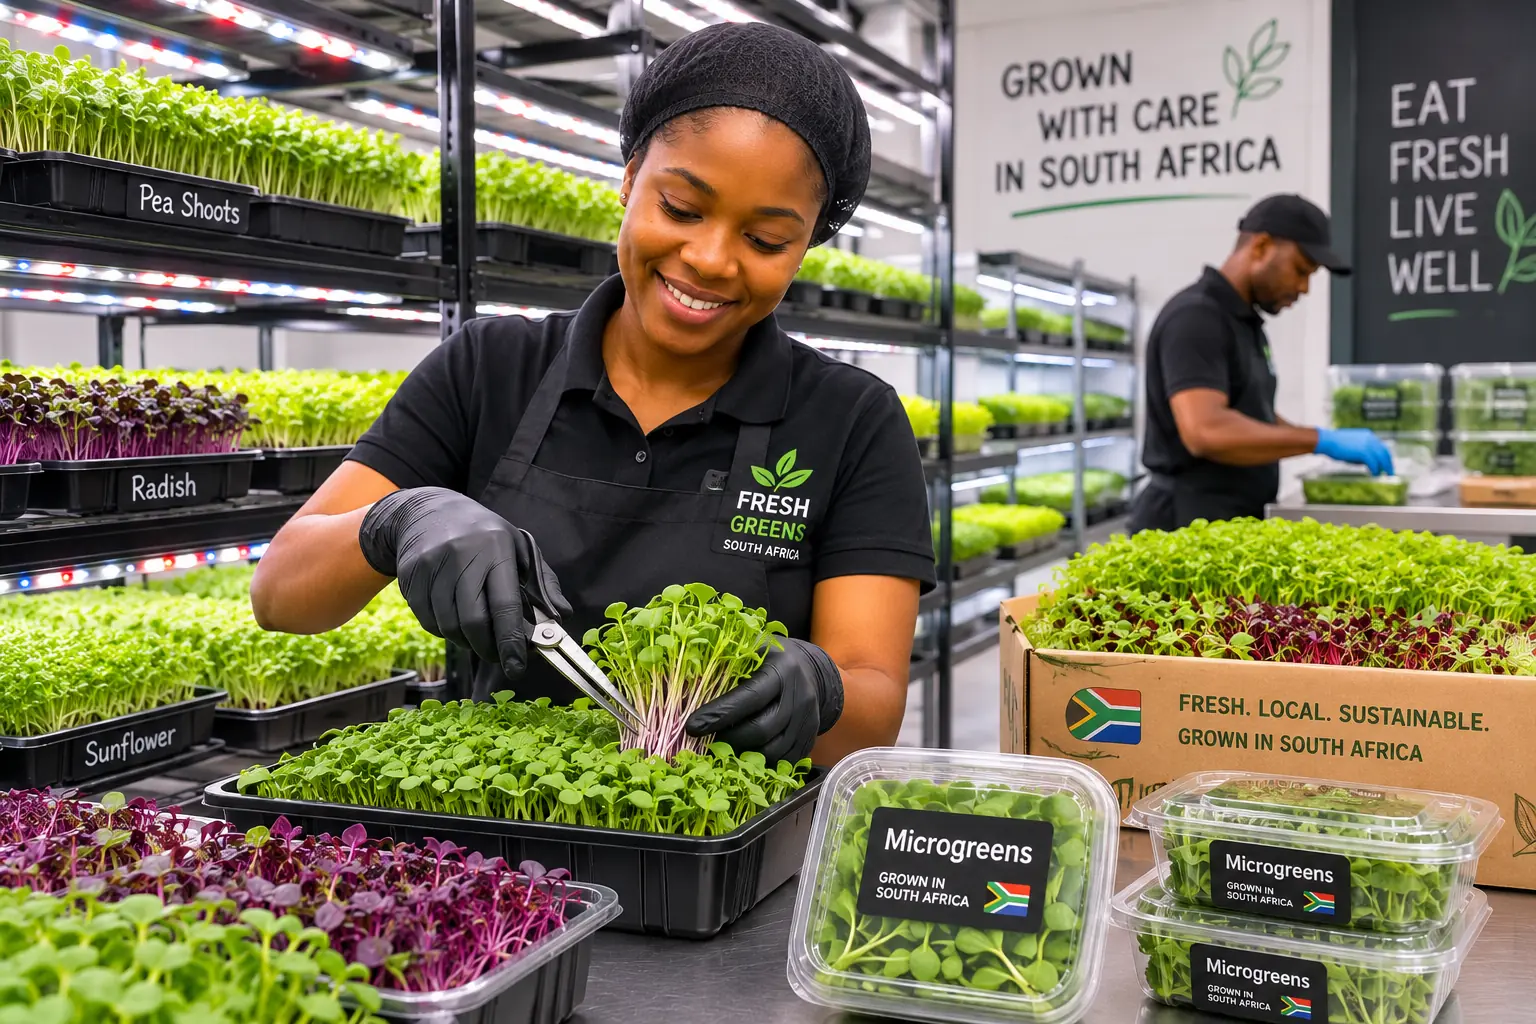
Best Microgreens Varieties for the South African Market
Not all microgreens are equally profitable or easy to grow. The best varieties for new South African growers combine fast growth, strong market demand, easy germination, and attractive presentation. Here is a practical guide to the most commercially important microgreens in South Africa:
| Variety | Days to Harvest | Seed Rate (per tray) | SA Market Price | Difficulty | Key Notes |
|---|---|---|---|---|---|
| Sunflower Shoots | 8–12 days | 200–250g | R180–R300/kg | Easy ✅ | Most popular in SA; thick, crunchy, nutty; very high yield per tray |
| Pea Shoots | 10–14 days | 180–220g | R200–R350/kg | Easy ✅ | Sweet, crunchy; loved by chefs; excellent fresh and as garnish |
| Radish (Red Arrow, Rambo) | 6–9 days | 30–40g | R250–R450/kg | Easy ✅ | Very fast; spicy, peppery flavour; beautiful red-white stems |
| Broccoli | 8–10 days | 25–35g | R350–R600/kg | Easy ✅ | Highest sulforaphane content of any microgreen; growing health food demand |
| Wheatgrass | 7–10 days | 200–250g | R150–R250/tray | Easy ✅ | Juice bars and health stores; sold by tray, not by weight |
| Coriander (Cilantro) | 14–21 days | 40–50g (crushed seed) | R300–R550/kg | Moderate ⚡ | Slower; pre-soak seed 12hr; strong demand from SA restaurants |
| Basil (Green & Purple) | 14–21 days | 15–25g | R400–R700/kg | Moderate ⚡ | Needs warmth (21°C+); very high value; hotels and fine dining |
| Amaranth (Red Garnet) | 10–14 days | 8–12g | R400–R650/kg | Moderate ⚡ | Stunning magenta colour; visually striking for plate garnish |
| Beet (Bulls Blood) | 12–18 days | 30–40g | R350–R600/kg | Moderate ⚡ | Deep red-purple colour; earthy flavour; popular with SA health food market |
| Mixed Salad Blend | 8–12 days | 20–30g (mixed) | R200–R400/100g punnet | Easy ✅ | Best retail pack; broad appeal; reduces dependence on single-variety buyers |
Equipment and Setup for a South African Microgreens Operation
Genuinely among the most appealing aspects of microgreens is the low capital requirement to start. Here is what you need at each scale of operation:
Beginner Setup (1–5 trays, home-based, under R2,000)
- Standard 25cm × 50cm black plastic grow trays with drainage holes (R15–R25 each from nursery suppliers)
- Growing medium: coco coir (compressed block, R45–R80 each, rehydrates to fill 10+ trays) or jute growing pads for wheatgrass and sunflowers
- Seeds: sourced from reputable seed suppliers, not treated vegetable seeds (treatments are toxic); use untreated or organic seeds specifically sourced for microgreens
- Natural light from a south-facing window is sufficient for small home operations; a simple 45W full-spectrum LED grow light (R300–R600) extends your growing capacity and improves stem strength
- A handheld spray bottle for watering and a simple kitchen scale for seed measurement
🏢 Small Commercial Setup (20–100 trays, R15,000–R60,000)
- Stainless steel or powder-coated steel wire shelving units (4–5 tiers, 1.2m × 0.6m), R1,500–R3,500 per unit from commercial catering suppliers
- Quality LED grow lights (full spectrum, 6,500K), R800–R2,500 per light bar; one light per shelf tier
- Automated bottom-watering trays or a simple misting timer system to reduce daily labour
- Commercial coco coir or peat-based growing medium in bulk (R2–R5 per tray fill)
- Food-safe clamshell punnets (100g, 125g) or biodegradable packaging for retail/restaurant sales
- A small dedicated growing space, a spare room, garage, or converted shipping container with temperature management (ideal 18–24°C)
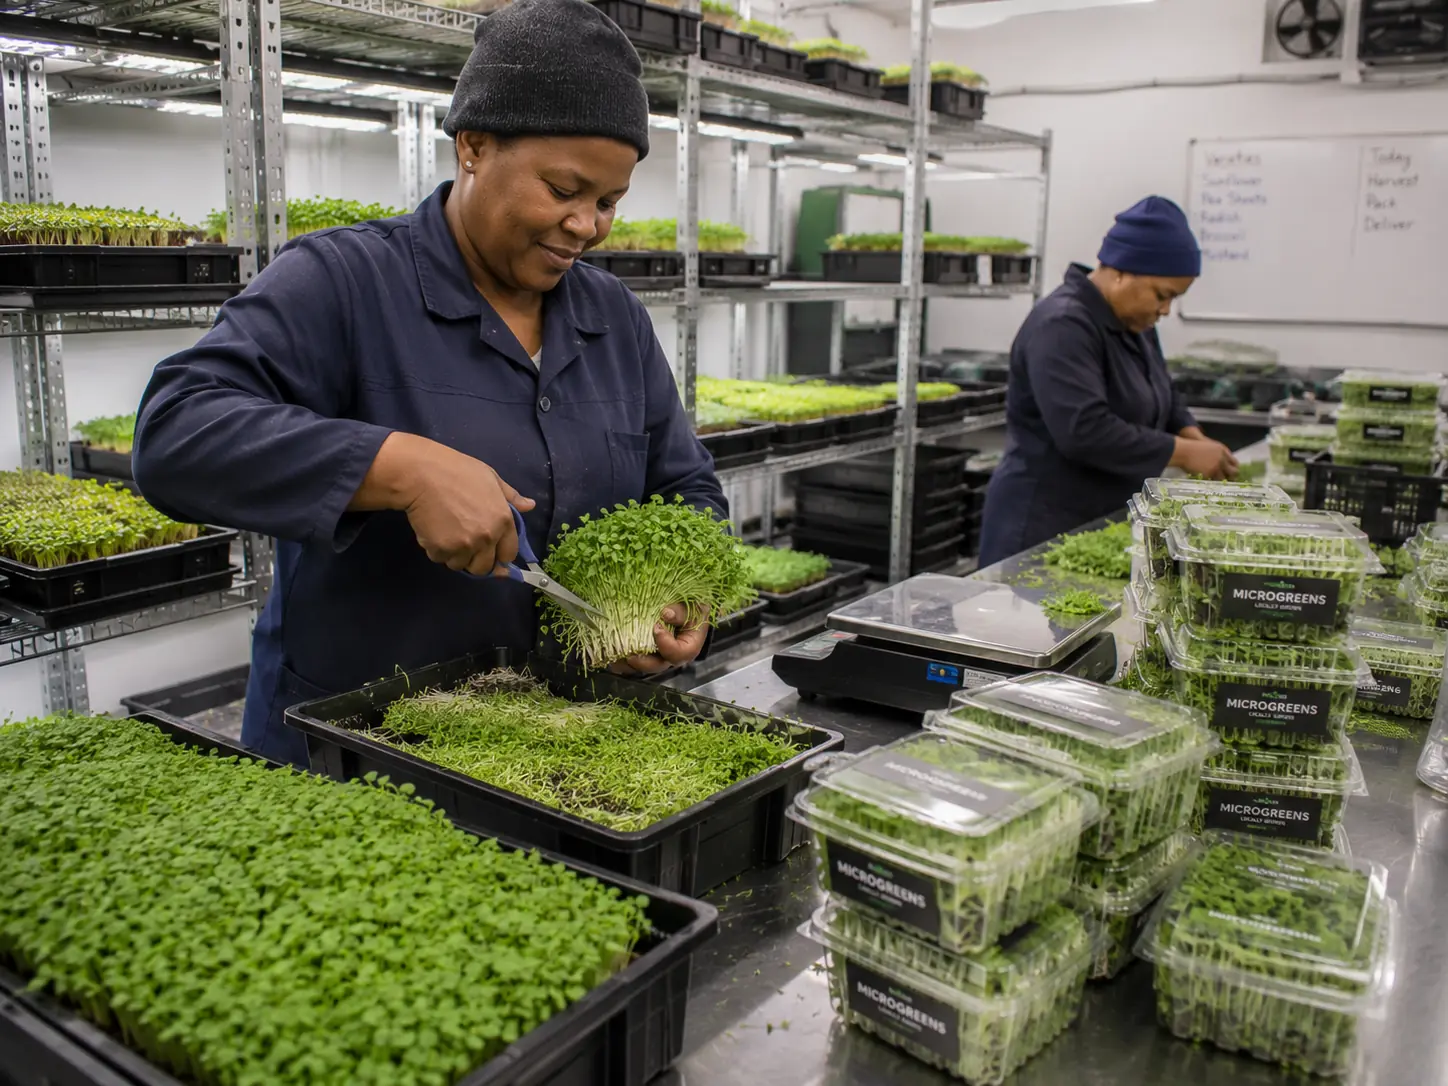
The Microgreens Growing Cycle, Step by Step
Prepare Your Trays and Growing Medium
Fill trays with 2–3cm of pre-moistened growing medium (coco coir, peat moss, or a commercial microgreens mix). The medium should be moist but not waterlogged, squeeze a handful and it should hold its shape without dripping. Level the surface gently. Using a solid tray underneath a trayed medium allows bottom-watering, which reduces mould risk dramatically compared to overhead watering by keeping the seed surface dry after germination.
Seed Soaking (for large seeds)
Large seeds (sunflower, peas, beets, and coriander) benefit enormously from pre-soaking in clean water for 8–12 hours before sowing. Soaking softens the seed coat, dramatically speeds germination (by 1–2 days), and increases germination uniformity. Drain soaked seeds thoroughly before sowing. Small seeds (radish, broccoli, basil, amaranth) do not require soaking, they germinate readily from dry sowing.
Sowing, The Most Important Step
Sow seeds evenly and densely across the tray surface. Overcrowding reduces airflow and promotes mould; under-seeding wastes tray space and reduces yield. Use the seed rates in the variety table above as a guide, weigh each seed portion on a kitchen scale for consistency. After sowing, mist the surface lightly and press seeds gently into the medium with a flat plate or the base of a clean tray. This improves seed-to-medium contact and germination uniformity, a critical step that many beginners skip, leading to uneven germination.
The Blackout Period (Germination Phase)
Stack a second tray (or cover with a light-proof lid) on top of the seeded tray for the first 3–5 days. This darkness and slight pressure mimics underground germination conditions, it dramatically improves germination rates, produces straighter, stronger stems, and forces roots downward into the medium. Check daily; as soon as seedlings are pushing against the cover with enough force to lift it (typically day 3–5), remove the cover and move trays to light. Many commercial growers add 500g–1kg of weight on top of the cover tray during this phase for additional stem straightening pressure.
The Light Phase (Growing)
Once the blackout cover is removed, expose trays to 12–16 hours of light per day. Natural bright indirect light works well in summer; a full-spectrum LED grow light (6,500K, positioned 10–15cm above the canopy) provides the most consistent results year-round and greatly reduces stretch (etiolation). During this phase, water from the bottom, pour water into the solid tray beneath the growing tray, allowing the medium to absorb moisture from below. Bottom-watering every 1–2 days is usually sufficient. Never overhead-water during the light phase, this promotes damping-off fungal diseases that can destroy an entire tray.
Harvesting and Packaging
Harvest with sharp, clean scissors just above the growing medium surface when plants are 3–8cm tall and the first true leaves are just beginning to emerge (or at the cotyledon stage for most varieties). Harvest in the morning when turgidity is highest. After cutting, spread loosely on a clean surface to dry any surface moisture before packing, wet microgreens compress, stick together, and spoil rapidly. Package immediately in branded 100g or 125g clamshell punnets. Store at 4–6°C; shelf life is 5–10 days depending on variety. Same-day or next-day delivery to restaurant clients delivers the best quality and commands the best repeat orders.
Preventing Mould, The Biggest Challenge for SA Microgreens Growers
Mould (particularly Pythium damping-off and surface grey mould) is the most common cause of crop loss in microgreens production, especially in South Africa's humid summer months. Prevention is entirely possible with the right practices:
- Never over-water, maintain the medium at "wrung-out sponge" moisture level, not saturated
- Use bottom-watering exclusively after germination, keeping seed surfaces and stems dry is the most powerful mould prevention strategy
- Ensure excellent air circulation, a small oscillating fan in your growing space reduces humidity and surface moisture dramatically
- Sow at the correct density, overcrowded trays have poor airflow between seedlings, creating ideal mould conditions
- Clean trays between uses, wash with a dilute bleach solution (1% sodium hypochlorite) and rinse thoroughly; old growing medium is a reservoir of fungal inoculum
- Reduce blackout period duration, extend it only as long as needed for germination; excess darkness at high humidity creates conditions for damping-off
Selling Your Microgreens in South Africa
🍽️ Restaurants and Hotels, Best Price, Consistent Volume
Fine dining restaurants, boutique hotels, and modern bistros are the most financially rewarding sales channel for microgreens in South Africa. Chefs use them for plate garnish, salads, and as flavour elements. Target restaurants that already use high-quality ingredients, approach the head chef or sous chef directly with a free sample box. Establish a weekly standing order, even 5–10 committed restaurant clients can sustain a small operation profitably. Pricing for restaurant supply: R200–R600/kg or R25–R80 per 100g punnet depending on variety and presentation.
🏪 Health Food Stores and Premium Retailers
Faithful to Nature, Wellness Warehouse, independent health stores, and premium grocery stores in South Africa's major cities stock microgreens from local producers. These buyers expect consistent supply, professional food-safe packaging, and preferably some form of food safety certification. Approach procurement managers or buyers with a product information sheet covering your growing method, seed sourcing, and shelf life data. Retail pricing: R35–R80 per 100g punnet.
🌐 Farmers Markets and Direct Consumer Sales
Cape Town's Oranjezicht City Farm Market, Johannesburg's Market on Main, the Neighbourgoods Market, and hundreds of smaller weekly markets across South Africa offer excellent direct-to-consumer sales opportunities. Market sales allow premium retail pricing and direct consumer feedback on varieties. Building a following on Instagram or WhatsApp for a weekly subscription box is an increasingly popular model for urban microgreens growers, customers order online and collect or receive delivery each week.
🥤 Juice Bars and Smoothie Chains
Wheatgrass and sunflower shoot trays are the dominant product for this channel. Juice bars purchase entire live trays (sold root-to-green before cutting) to juice fresh on demand. Typical tray prices for this channel: R80–R180 per wheatgrass tray; R120–R250 per sunflower shoot tray. This is a high-volume, lower-price channel but extremely consistent in demand.
⚠️ Seed sourcing is critical: Never use hardware store vegetable seeds or seed packets treated with fungicides or insecticide coatings for microgreens, the treatments are intended to protect germinating plants in outdoor soil conditions and are not food-safe when consumed on the seedling. Always source untreated, food-grade seeds specifically sold for microgreens or sprouting from reputable SA suppliers such as Living Seeds, African Seeds, or dedicated microgreens seed suppliers.